Thursday, November 9, 2017

Take the Gratitude Challenge


Take the Gratitude Challenge !
When we practice gratitude, sometimes it tends to be a quick, shallow gratitude. We say a quick thank you, or list what we’re grateful for, but it is momentary.  As soon as we’ve finished saying the words, we often move on to thinking about something else.   Real gratitude should be deeper and more meaningful than that.  It should affect both the giver and the receiver for more than just a moment.  So here is the challenge.
Each day this week, think of one person you are grateful for and a specific time (or times) they did or said something that blessed you.
Think of a specific situation and reason you are grateful for that person.  Really think about it. Let it sink in.  It doesn’t have to be for something monumental.  It can be as simple as being thankful for the bus driver that picks up your kids and gets them to school safely every morning, or the bagger at the grocery store that packs up your groceries for you.  It can highlight generational appreciation, like being thankful for your grandmother who taught you how to make her amazing apple pie.  It can be expressing thanks to your kids for always wanting a goodnight kiss from you before bed. If you really stop to think about it, there are probably a whole lot of people to be grateful for.
Take the time to thank that person intentionally, specifically, and meaningfully.
Tell that person specifically why you are thankful for them or for what they have done.  Thank them face-to-face; write them a letter; call them on the phone; send them a text.  It doesn’t really matter what medium is used.  What matters is that you communicate your gratitude in an intentional and specific manner.  “Thank you so much for saving me a seat at lunch today. That was really considerate.” means a lot more than just a quick “thanks”.
Expressing gratitude can truly be restorative to your demeanor, your health, and your relationships.  It is also a kindness than really blesses others and is so needed in the world we live in today.
Try it out!  See what the gratitude challenge can do for you and the people around you!


Friday, August 5, 2016

Olympics & Geography Lesson Plan

With the Summer Olympics starting, I wanted to use it as an opportunity for both a lesson on the Olympics and a geography lesson.


The Modern Olympic Games

The Olympic Games are an international competiton of summer and winter sports. Thousands of athletes from all over the world compete in a wide variety of events. The games are currently held every four  years, with Summer and Winter Olympic Games alternating. Each Olympic games are held in a different international city. 

The celebration of the games encompasses many rituals and symbols.

The Olympic flag  and Olympic rings                                          The Olympic  Torch


The Olympic flag is white with 5 rings – blue, black, red, yellow, and green.  Together, they represent the five inhabited continents, although no particular ring is meant to represent any specific continent. (The Americas are treated as one continent.) The rings are interlaced to represent the idea that the Olympics are universal, bringing athletes from the entire world together.


The Olympic torch is lit in Ancient Olympia, Greece, emphasizing the connection between the modern Olympic games and the ancient Olympic games (which were in Greece).  The lighting marks the symbolic start of the Olympic Torch Relay.  A long relay of runners carry the torch from Greece to the country hosting the Olympics and all over that host country. It takes many many weeks before it reaches  the Olympic Stadium for the Opening Ceremony.

The Olympic games starts with the  opening ceremonies where the athletes from each country all march in together with their country’s flag.  
Then the sports competitions begin. The first, second, and third place finishers in each event receive gold, silver or bronze Olympic medals.  

Who revived the idea of the Olympic Games?
A French nobleman, Pierre Fredy, the Baron de Coubertin, born in 1863. When he was young, Coubertin was a very keen sportsman. As he grew older he developed a passionate belief that sport could encourage peace throughout the world and bring people from all over the world together.

Coubertin was inspired by the ancient Olympic Games and travelled around the world, spending his own money, trying to persuade people to revive them. Eventually he managed to bring together representatives of many different countries in Paris, in 1894, and the Olympic Movement was begun.

When and where were the first modern Olympic Games held?
The first modern Olympic Games were held in Athens in 1896.

Did women compete in this first modern Olympic Games?
No! Women began to compete in 1900. For many years there were problems for the women athletes about what to wear, because it was considered very rude to show any part of the body or even the shape of the body! Can you imagine trying to run and jump covered from head to foot in clothes?

What is the aim of the Olympic Movement?
"The goal of the Olympic Movement is to contribute to building a peaceful and better world by educating youth through sport practiced without discrimination of any kind and in the Olympic spirit, which requires mutual understanding with a spirit of friendship, solidarity and fair play."

What is an Olympiad?
An Olympiad is the period of four years which starts with a summer Olympic Games. Each Olympiad is counted with Roman numerals, and the year of the Games cannot be changed (although Games have been skipped out, as in 1916 during the First World War).

Who chooses the next host for the Olympic Games, and how?
Members of the IOC choose the next venue for the Olympic Games, which must be a city rather than a country. So, for example, the next Olympics, in 2016, will be hosted by Rio de Janeiro, rather than Brazil. Any city which wishes to host the Games can put their bid to the IOC. Only one city from each country can bid, and even putting forward a bid takes a huge amount of work and is very expensive. It usually takes many years to prepare, and of course only one city can be successful!

Who selects each country's team of athletes?
Each country has their own National Olympic Committee (NOC). The NOCs represent their countries at the Olympic Games and select their own national teams.

What is the Olympic torch?
Prior to each Games, the Olympic Torch or Flame is lit in Olympia, Greece and brought to the host city by runners carrying the torch in relay.

Make an Olympic Torch

What is the Olympic creed?
"The most important thing in the Olympic Games is not to win but to take part, just as the most important thing in life is not the triumph but the struggle. The essential thing is not to have conquered but to have fought well."

Who wins medals?
The athletes or teams who come first, second and third win medals: respectively gold, silver and bronze.

Are the gold medals real gold?
No! They were solid gold until 1912, but are now silver covered with a thin layer of gold.

Why do we have the Olympic rings as the emblem of the Olympic Games?
The five interlocking rings (blue, yellow, black, green, and red respectively) of the emblem was originally designed in 1913 by Pierre de Coubertin, to symbolize the five continents of the world taking part in the Olympic Games (the Americas are viewed as a single continent, and Antarctica is omitted).

Paper Plate Olympic Rings  or trace circles on colored construction paper and cut out and glue on white cardstock.

What is the Olympic motto?
"Citius, Altius, Fortius.", which is Latin for "Swifter, Higher, Stronger"

*  *  *  *  *  *  *  *  *  *  *  *  *  *  *  *  *  *  *  *  *  *  *  *  *  *  *  *  *  *  *  *  *  *  *  *  *  *  

Here is a link to an awesome world map that you can print as large as you want it (on 1 page, on 4 pages, etc.)  It doesn't have country names, but I like that you can choose how large to print it.

Printable - World Map 

World Countries and their Flags


Printable - World Flags and Countries (Top countries and full list)
https://drive.google.com/file/d/0B8kjUkAfacxZcHpQUHRFUHpXNnM/view?ts=57a50428

Here is a Printable PDF of this whole Lesson Plan
https://drive.google.com/file/d/0B8kjUkAfacxZaEd0cGo5VklSMUU/view?ts=57a500c2


Wednesday, December 16, 2015

One-on-one time with Mama or Daddy Coupons

A friend posted this great idea of giving the gift of PRESENCE for Christmas to her children in the form of one-on-one time coupons.  I LOVED this idea, so I took it and quickly created my own one-on-one time coupons to use as stocking stuffers for the kids.


Saturday, June 27, 2015

Easy and quick hot mini pizza bites

So, my kids get pretty sick of sandwiches and the types of other things I pack them for lunch at school.  On weekends, holidays, and summer days, I like to mix it up a little with not too much effort. No, this one is not the healthiest of items, but you can pair them with some cut up fruit or carrots and call it a day.

After my son requested "pizza lunchables", I decided I'd try to instead buy similar ingredients and make them myself.  With a little trial and error, I think we finally hit a winner.  We found a cracker that tastes more like a crunchy pizza crust than a crumbly cracker, and found that warming them up produces a much tastier pizza bite.

Here are the instructions:
You will need a package of shredded mozzarella (the finer shreds), a package of Town House Flatbread sea salt crackers (and this brand/variety seem to work the best, WAY better than any other crackers we've ever tried), and pepperoni (whatever brand/variety you like.)

 Put a few crackers on a microwaveable plate.
 Layer a pepperoni on each cracker.
 Sprinkle some cheese on top of each pepperoni. (The finer shreds melt faster than the thicker shreds.)
 Microwave for 15 seconds or until the cheese is slightly melted.
Let cool a little, and enjoy!


Monday, March 9, 2015

styrofoam snowmen

We had a "snow day" (due to the frigid temps, not the snow), so I had the kids do a snowman craft to help fill the day. 
I had bought small styrofoam circles in various sizes from the dollar store.  We used toothpicks to put the styrofoam circles together. We rubbed the bottom circle against the table which filed it dow/flattened it a little so the circle would rest on a flat surface.  I then hotglued them to paper plates for stability. 
The kids used toothpicks, buttons, and felt scraps to decorate their snowmen (which I hotglued into place.) We were able to cut out mittens, and scarves out of the felt. I even was able to construct felt top hats using hot glue.   The kids had a blast making these. 


Wednesday, October 29, 2014

Making s'more cookies

I love s'mores, but we don't often have a fire pit and don't have a working fireplace to do them often. 
We found a way to make yummy smores in cookie form!

 First, you make the graham cookie base.  Then layer on halved marshmallows and bake for a bit.
 The marshmallows get brown and toasty.
 Then add on the chocolate and bake to slightly melt the chocolate.
These cookies were a HUGE hit with the kids!
 I think they would be awesome with peanut butter (which is what the recipe called for), but we substituted JIF almond butter because of C's peanut allergy, and they came out just fine.

S’more Cookies
Makes 4 dozen
Ingredients
1 cup flour
¾ cup fine graham cracker crumbs
½ tsp baking soda
¼  tsp salt
1 stick butter, softened
½ cup creamy peanut butter OR JIF brand almond butter
½ cup sugar
½ cup brown sugar, packed
1 egg
1 tsp vanilla extract
24 large marshmallows, halved
8 hershey chocolate bars, broken into their small rectangular pieces

Preheat oven to 375 degrees.  Whisk together flour, graham cracker crumbs, baking soda, and salt in a bowl.  Cream butter, peanut butter/almond butter, sugar, and brown sugar in a large bowl.  Mix with an electric mixer until fluffy, about 5 minutes.  Beat in egg and vanilla until incorporated.
Scoop dough (about 1 Tbsp worth) onto ungreased cookie sheet.  Be careful not to make the scoops too big.  Bake cookies 5 – 6 minutes.
Take out and put marshmallows on top of each cookie. Bake for 2 more minutes.  Turn the oven to broil and bake for 60 – 90 seconds, CAREFULLY watching so they don’t burn because they go from being white to burnt VERY quickly. .  Take out and turn oven back to 375. (This is important!)  Put 1 – 2 mini rectangles of chocolate on top of the marshmallows.  Bake 2 – 3 more minutes to finish off cookie.  Let set on the pan for a good 4 -5  minutes .  (If you try to remove them right away, the center is too soft and will break.) 


Monday, June 23, 2014

Making a cardboard castle with mini flags.

Take several cereal boxes, cut one side open and then tape back together inside out (so the brown cardboard inside shows on the outside.). You can cut castle details, glue on windows or architectural details. You can add cones or toilet paper rolls and make it as fancy as you like. 
I think the kids favorite part was making the flags. I brought up a picture of all the various countries' flags and they drew them with markers on small rectangle pieces of paper. Then they taped them to toothpicks and I helped tape them onto the castle. They loved doing it and also learned what a lot of different countries' flags look like.  So simple and you just use supplies around the house. 

Monday, February 24, 2014

Snowman doughnuts

For my daughter's "Frozen" birthday party, we made Olaf snowman doughnuts.
You need a package of the small powdered doughnuts (we used hostess brand), powdered doughnut holes, mini chocolate chips, pretzel sticks, and toothpicks.
Stack 2 small doughnuts on top of eachother, put in a toothpick so the point is sticking straight up. Then carefully stick a small doughnut hole on top. (The toothpick helps stabilize the snowmen. Without it, the head keeps rolling off if the plate is bumped.) Stick mini chocolate chips in as eyes and buttons. Snap mini pretzel sticks in half and poke in as the arms and nose. These were a huge hit with the kids!  Just be sure to take out the toothpick if serving to small children.

Tuesday, November 5, 2013

Rice Krispie Treat Pumpkins

We made these for my son's preschool Halloween treat.

Ingredients Needed
6 cups rice krispies
6 Tbsp butter (NOT 3 like the box says)
40 regular sized marshmallows
red and yellow food coloring
mini tootsie rolls (midgets)

Melt 6 Tbsp butter in a non-stick pan over low heat. (Note - Use 6 tbsp instead of the 3 called for on the box because they will yield much softer treats that won't turn into bricks when cooled.) Add in marshmallows and stir until melted. Add a few drops of yellow food coloring and 1-2 drops red food coloring to turn the marshmallows into the desired orange color. (We didn't use very much because I didn't need mine to be crazy bright orange).
 Remove the pan from heat and quickly add in the 6 cups of rice krispies. (It pays to pre-measure these in a separate bowl so you can add them to the pan all at once.)  Stir quickly to mix all the marshmallow and krispies together.
Press a heaping mound into a mini muffin tin. Press a tootsie roll halfway into the mound. Let cool for a few minutes. Then carefully remove the krispie treat and slightly reshape the bottom into a rounded pumpkin shape. Let cool completely on wax paper.


 If you are feeling ambitious, I've seen some pipe green frosting leaves.  I didn't do this because we packaged them up in individual little plastic bags and the frosting would have smeared all over.

Friday, October 25, 2013

Fall leaves Project.

We did a fall leaves project where the kids collected colored leaves, glued a tree trunk and branches (that I cut out from brown construction paper) onto a blue piece of construction paper and then glued the leaves on.  They had fun doing it and we used materials we already had around the house!

Materials Needed
Brown construction paper
Blue construction paper
scissors
glue
Fall leaves (freshly collected. Dried ones won't work as well.)


Thursday, October 3, 2013

Halloween T-shirts

My daughter is invited to a birthday party on Saturday and she was asked to wear "Halloween colors" or clothes. Looking in her closet, I realized she didn't have anything orange or black or remotely "Halloweeny".  I didn't want to spend a lot on the cute, but pricey Halloween shirts  on Etsy. My sewing machine is on the fritz, so I that took sewing out of the equation. I decided to do a quick iron-on pumpkin on an orange T-shirt. Super easy. Super quick. Super cheap. 
I found kid-sized orange T-shirts at Jo-Ann Fabrics (and on sale too!) I purchased 1/4 yard of orange striped fabric and used brown and green scraps of fabric that I already had.  I pre-washed them to prevent shrinking issues when the shirt is washed.
I then ironed wonder-under onto the fabric, and cut out a pumpkin shape with stem and a leaf.  Following the wonder-under instructions, I ironed the pumpkin onto the T-shirt and voila!
I thought the pumpkin potentially looked too girly for my boys, so I used some black fabric and wonder-under to make them jack-o-lantern shirts.


Monday, March 18, 2013

Rainbow cake with a pot of gold!

For St Patrick's day, we made a rainbow cake with a pot of gold on top!
 
Instructions
Step 1. Make your favorite yellow cake batter.  From scratch. From a mix. It doesn't matter.  If you do use a mix, always use the "butter yellow" version. It tastes much better. Don't even buy white cake mix...in my opinion it tastes terrible!
If you are going to make a 8 or 9 inch round cake, then make the whole mix.
If you are going to make a small cake (I used two 6 inch cake pans ), then you only need to use half the mix or recipe.
Step 2. Divide the batter evenly into 5 bowls.  (Yes - I know this makes a lot of dishes, but the end result is worth it!)
Step 3. Using food coloring, dye one bowl of batter red, one orange, one yellow, one green, and one blue.  Stir each portion of batter well to evenly distribute the food coloring.
Step 4. Grease the bottom of your pan. Cut a circle of parchment paper into a circle and line the bottom of your pan. Grease the top of the parchment as well.
Step 5. Pour one color batter into your pan and bake until cake bounces back in the center when gently touched or a toothpick comes out clean.  If you have 2 pans of the same size, you can obviously bake 2 colors at the same time.  Note - the baking time will be shorter than the time listed on the box or in the recipe because you are using significantly less batter  in the pan than normal because you are making each layer separately.  I baked each 6 inch cake layer about 10 minutes.
Step 6.  Let the cake cool slightly. Remove from the pan and let cool completely on a rack.  Once the pan is cool enough, put a new parchment paper in, grease it, and bake the next color batter.
Repeat this until all of the layers have been baked.
Step 7. Once the cake layers are cooled down, make your favorite frosting. (Thicker frosting works better with so many layers. ) I suggest this icing.   http://www.epicurious.com/recipes/food/views/Amy-Sedariss-Vanilla-Buttercream-Frosting-236126
Be aware, there are much less "sugary" icings out there, but this one holds up well to the multiple layers and to hotter temperatures.

Step 8. Put the blue layer down. Frost lightly with frosting. Then layer the green on top. Frost. Layer with yellow. Frost. Layer with orange. Frost. Layer with red. You can then frost the top and the sides of the cake for the most finished look. (I didn't want to fuss with the sides, so I just frosted the top. )

Step 9 I cut off the top of a thin mint cookie, and sprinkled gold sprinkles as if they were spilling out of the pot of gold. (I just happened to have gold sprinkles on hand from a prior project. You can use yellow sprinkles or something similar.)
Step 10: When you cut into the cake, it looks really cool and the rainbow really pops!
 

Saturday, March 16, 2013

Cinnamon Sugar Tortilla Crisp Snowflakes!

Today we made cinnamon sugar snowflake tortilla crisps. It's the perfect thing to make with leftover tortillas!

- Adjust your oven rack to the center of the oven.. Preheat your oven to 350 degrees Fahrenheit.
- Melt 3 or 4 tbsp. butter in a small bowl. In another bowl mix 1/2 cup sugar, 2 or 3 teaspoons .
Combine the sugar and cinnamon, stirring until well blended.

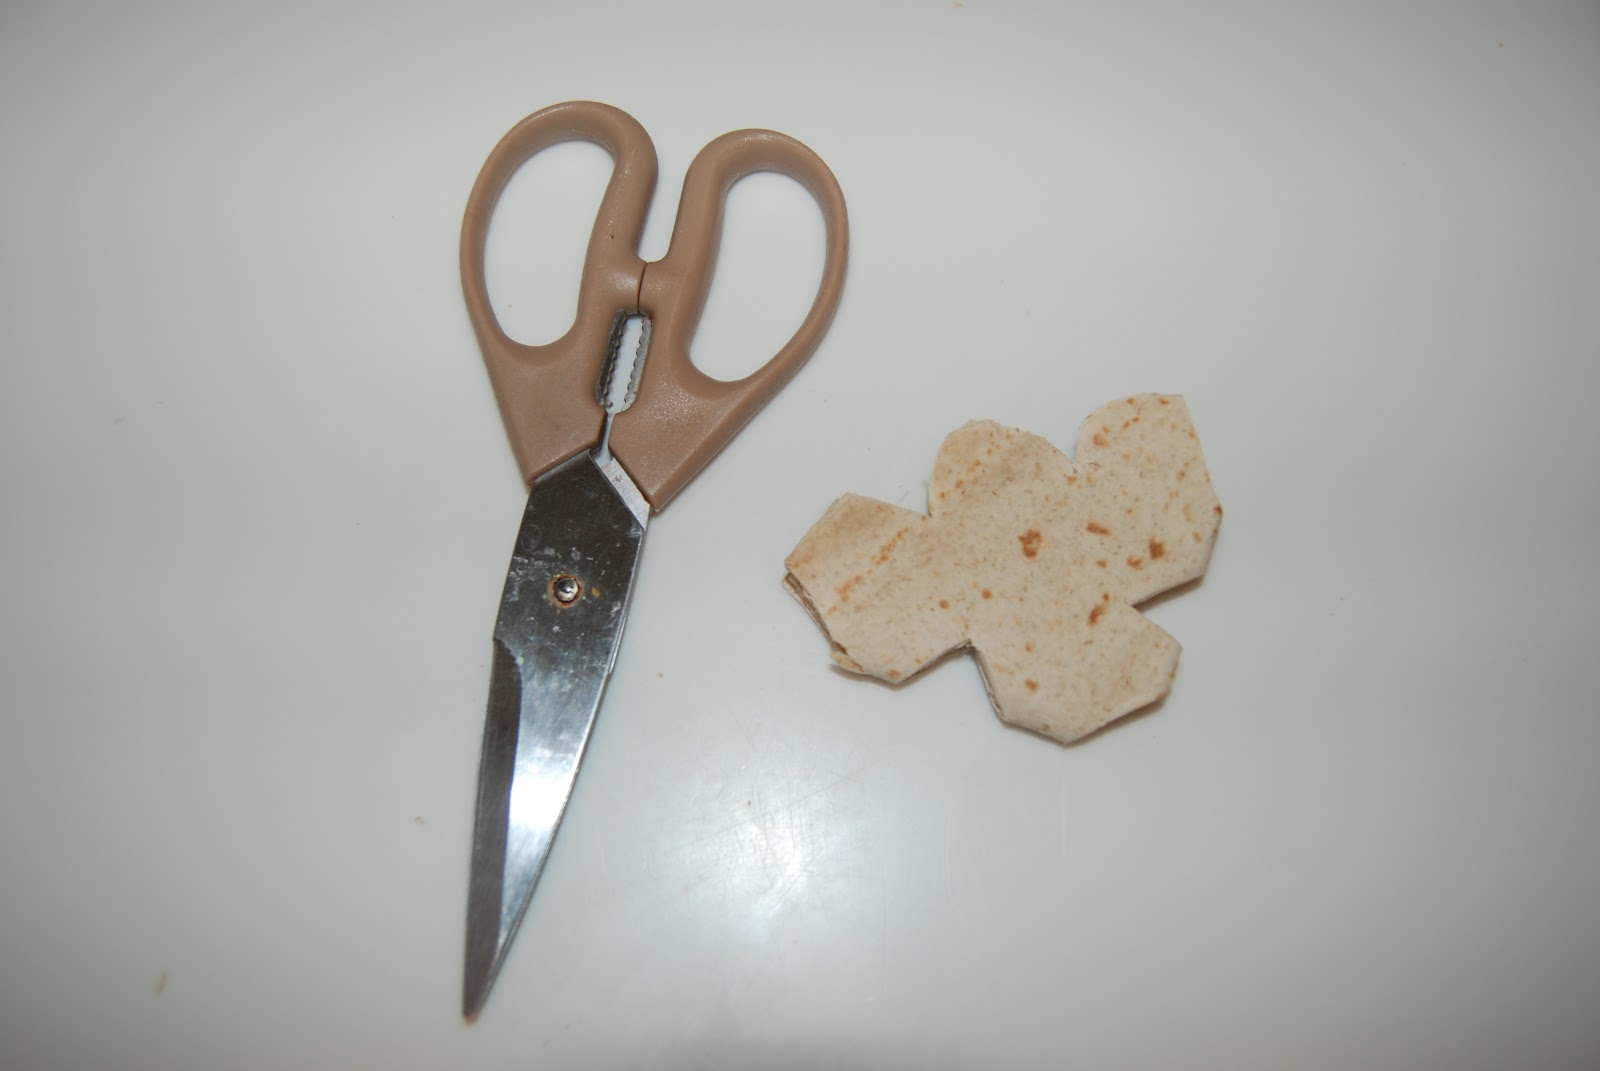
- To make snowflakes, fold the tortilla in half, and then in half again.

- Cut as you would a paper snowflake, cutting out shapes, but keeping parts of the seams intact. Carefully, open tortillas back up.

- Or, for simple wedges instead of snowflakes, cut a stack of 6 or 8 flour or corn tortillas into wedges, as you would a pizza, using a pizza cutter, or kitchen shears.  

- Lay the tortillas out on a cookie sheet, arranging them so they don't touch. Brush one side of the tortillas with melted butter. Sprinkle the chips with the sugar and cinnamon mixture. Flip them over and brush the other side with melted butter and sprinkle with the cinnamon sugar.

- Bake the chips for approximately 6 to 8 minutes, shaking the pan gently after about 4 minutes to prevent sticking. Watch the chips carefully to avoid burning; the chips will turn a light, golden brown when finished.

Serve warm or cool.