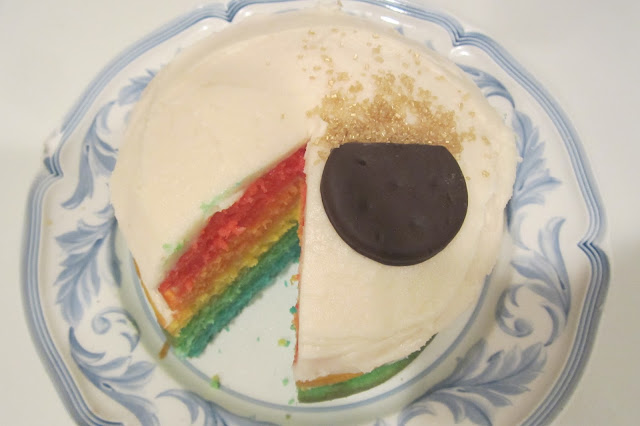
For St Patrick's day, we made a rainbow cake with a pot of gold on top!
Instructions
Step 1. Make your favorite yellow cake batter. From scratch. From a mix. It doesn't matter. If you do use a mix, always use the "butter yellow" version. It tastes much better. Don't even buy white cake mix...in my opinion it tastes terrible!
If you are going to make a 8 or 9 inch round cake, then make the whole mix.
If you are going to make a small cake (I used two 6 inch cake pans ), then you only need to use half the mix or recipe.
Step 2. Divide the batter evenly into 5 bowls. (Yes - I know this makes a lot of dishes, but the end result is worth it!)
Step 3. Using food coloring, dye one bowl of batter red, one orange, one yellow, one green, and one blue. Stir each portion of batter well to evenly distribute the food coloring.
Step 4. Grease the bottom of your pan. Cut a circle of parchment paper into a circle and line the bottom of your pan. Grease the top of the parchment as well.
Step 5. Pour one color batter into your pan and bake until cake bounces back in the center when gently touched or a toothpick comes out clean. If you have 2 pans of the same size, you can obviously bake 2 colors at the same time. Note - the baking time will be shorter than the time listed on the box or in the recipe because you are using significantly less batter in the pan than normal because you are making each layer separately. I baked each 6 inch cake layer about 10 minutes.
Step 6. Let the cake cool slightly. Remove from the pan and let cool completely on a rack. Once the pan is cool enough, put a new parchment paper in, grease it, and bake the next color batter.
Repeat this until all of the layers have been baked.
Step 7. Once the cake layers are cooled down, make your favorite frosting. (Thicker frosting works better with so many layers. ) I suggest this icing. http://www.epicurious.com/recipes/food/views/Amy-Sedariss-Vanilla-Buttercream-Frosting-236126
Be aware, there are much less "sugary" icings out there, but this one holds up well to the multiple layers and to hotter temperatures.
Step 8. Put the blue layer down. Frost lightly with frosting. Then layer the green on top. Frost. Layer with yellow. Frost. Layer with orange. Frost. Layer with red. You can then frost the top and the sides of the cake for the most finished look. (I didn't want to fuss with the sides, so I just frosted the top. )Step 9 I cut off the top of a thin mint cookie, and sprinkled gold sprinkles as if they were spilling out of the pot of gold. (I just happened to have gold sprinkles on hand from a prior project. You can use yellow sprinkles or something similar.)
Step 10: When you cut into the cake, it looks really cool and the rainbow really pops!


